The information on these pages may be out of date, or may refer to
resources that have moved or have been made read-only.
For more information please refer to the
Apache Attic

The current page provides instructions on how to set up Eclipse™ to develop Java code in Apache Harmony, with sections for both DRLVM and class library development.
DRLVM specific instructions are only emerging, while class library specific instructions are in two sets: the fast path for people familiar with Eclipse and the source code layout in Harmony's Subversion® repository; and the step-by-step guide for novices who want to follow the details of a setup and see a brief development example.
All instructions assume you satisfy the same Eclipse-based development prerequsities, as described in the following section.
To develop Apache Harmony Java code with Eclipse JDT, you need:
Optionally, you may wish to use one of the external, production-grade virtual machines that work with the Apache Harmony class library. These can be found on our Other Projects page.
Next you will need the code to work with. For class library development,
you will need a compatible VM, such as DRLVM or IBM® virtual machine (the latter
available under a non-open source, binary evaluation license). Install the VM following the
instructions that accompany that VM in the same location as the class libraries build (or the
location you will be building to if you are building the class libraries yourself).
You will also need a class libraries build if you want to work
on an individual module.
Analogously, you will need the class libraries for DRLVM development. Follow one of these ways depending on your needs:
///for the class libraries
http://svn.apache.org/repos/asf/harmony/enhanced/classlib

///for DRLVM
http://svn.apache.org/repos/asf/harmony/enhanced/drlvm
Check out the code from SVN selecting Checkout... from the context menu of
trunk.
For details on how to build DRLVM and other related documentation, please see the DRLVM web pages.
If you know your way around Eclipse JDT, then following these steps will have you hacking Harmony Java code in no time at all!
Ensure that you have the development prerequisites
in place. Then if you are using Linux start Eclipse as normal with the arguments
-vmargs -Dpde.jreProfile=none -Dpde.allowCycles=true and skip to step 4. If
you are using Windows do the following:
vsvars32.bat file from your Visual Studio install directory
to any convenient location. If you have chosen the defaults when installing, you
will find the given file in the
C:\Program Files\Microsoft Visual Studio.NET 2003\Common7\Tools directory.vsvars32.bat file adding the following line right after the
last line beginning with @set...:
start C:\...\eclipse\eclipse.exe -vmargs -Xmx512M -Dpde.jreProfile=none -Dpde.allowCycles=trueIn the line above,
"..." is the path to your Eclipse installation directory.
Note
Using -vmargs -Xmx512M is optional,
but helpful to stop Eclipse running out of memory.
vsvars32.bat file.
jre/lib/boot directory of the classlib snapshot.ecj_3.2.jar file into the
...\eclipse\plugins\org.apache.ant_1.6.5\lib directory.ecj_3.2.jar file from
the org.apache.ant_1.6.5\lib directory.
The Apache Harmony class library is structured to allow developers to work on individual modules in the class library without having to load and compile the entire project source tree.
This is best illustrated by a worked example. In this example, assume you want to make
a change to the NIO module. This is how you would proceed:
trunk > modules. Select
nio and from the context menu select
Checkout..., and on the checkout dialog box click Finish.src/main/java and the unit tests
are in the source folder src/test/java.AllTests suite for all tests in a package or module.
For example, to run the test suite
org.apache.harmony.tests.nio.AllTests set up a
run configuration with the following characteristics:
JUNIT JAR file.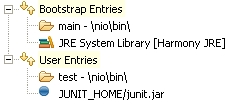
We have produced a brief webcast for those who want to see a step-by-step guide to configuring Eclipse, and developing a patch to the classlibrary code. The webcast starts assuming you have already installed the pre-requisites for Eclipse-based development, and launched Eclipse with the following commandline:
eclipse -vmargs -Dpde.jreProfile=none -Dpde.allowCycles=trueWe pick up the story here... (Warning 8Mb flash download!)